아두이노 보드가 ESP-01 모듈을 통해 인터넷에 연결 가능함을 확인했으니, 이제는 외부에서 ESP-01 모듈을 통해 아두이노에 명령을 내릴 수 있도록 해야 한다. 외부에서 아두이노 보드에 접근할 때는 모바일앱이나 웹브라우저를 사용하는게 일반적인데, 모바일앱을 만들기는 부담스러우니 웹브라우저를 통해 접근해 명령을 내릴 수 있도록 할 생각이다.
웹브라우저를 통해 접근할 때 응답을 해주려면 우선 아두이노 보드에 웹서버가 실행되고 있어야 하고, 접근 시도에 응답하고 명령을 받아 아두이노 보드에게 명령을 전달할 수 있는 웹프로그램을 작성해 웹서버에 등록해 놓아야 한다.
인터넷을 검색해보니 WiFiEsp 라이브러리를 사용하는 예제가 많아 보여서 이걸 사용하기로 했다. 우선 라이브러리를 설치해야 하는데, 다행히 아두이노 IDE 에서 바로 검색해 설치할 수 있었다.

사용법은 gitHub.com 을 참고했다.
https://github.com/bportaluri/WiFiEsp
GitHub - bportaluri/WiFiEsp: Arduino WiFi library for ESP8266 modules
Arduino WiFi library for ESP8266 modules. Contribute to bportaluri/WiFiEsp development by creating an account on GitHub.
github.com
우선 접속이 되는지 여부를 파악하고자 제공되는 예제코드를 이용해 테스트해봤다. 와이파이 SSID 와 와이파이 비밀번호, 통신 속도, 접속 시의 응답내용 부분만 조금씩 수정했다.
#include "WiFiEsp.h"
#ifndef HAVE_HWSERIAL1
#include "SoftwareSerial.h"
SoftwareSerial Serial1(2, 3); // RX, TX
#endif
char ssid[] = "{와이파이 SSID}"; // your network SSID (name)
char pass[] = "{와이파이 비밀번호}"; // your network password
int status = WL_IDLE_STATUS; // the Wifi radio's status
int reqCount = 0; // number of requests received
WiFiEspServer server(80);
void setup() {
Serial.begin(9600);
Serial1.begin(9600);
WiFi.init(&Serial1);
if (WiFi.status() == WL_NO_SHIELD) {
Serial.println("WiFi shield not present");
while (true);
}
while ( status != WL_CONNECTED) {
Serial.print("Attempting to connect to WPA SSID: ");
Serial.println(ssid);
status = WiFi.begin(ssid, pass);
}
Serial.println("You're connected to the network");
printWifiStatus();
server.begin();
}
void loop() {
WiFiEspClient client = server.available();
if (client) {
Serial.println("New client");
boolean currentLineIsBlank = true;
while (client.connected()) {
if (client.available()) {
char c = client.read();
Serial.write(c);
if (c == '\n' && currentLineIsBlank) {
Serial.println("Sending response");
client.print(
"HTTP/1.1 200 OK\r\n"
"Content-Type: text/html\r\n"
"Connection: close\r\n"
"\r\n");
client.print("<!DOCTYPE HTML>\r\n");
client.print("<html>\r\n");
client.print("<h1>Hello World!</h1>\r\n");
client.print("Requests received: ");
client.print(++reqCount);
client.print("<br>\r\n");
client.print("</html>\r\n");
break;
}
if (c == '\n') {
currentLineIsBlank = true;
}
else if (c != '\r') {
currentLineIsBlank = false;
}
}
}
client.stop();
Serial.println("Client disconnected");
}
}
void printWifiStatus()
{
Serial.print("SSID: ");
Serial.println(WiFi.SSID());
IPAddress ip = WiFi.localIP();
Serial.print("IP Address: ");
Serial.println(ip);
Serial.println();
Serial.print("To see this page in action, open a browser to http://");
Serial.println(ip);
Serial.println();
}
아두이노 IDE 에서 업로드해보면 아래와 같이 결과 로그가 나온다. 여기서 현재 공유기에서 할당 받은 아이피와 이 아이피를 기반으로 한 접속 URL (http://192.168.123.106) 도 확인할 수 있었다.

웹브라우저에서 http://192.168.123.106 로 접속해보면 아래와 같이 잘 나온다.

그런데 저렇게 아이피만 입력해도 응답을 해주는 것은 별로 바람직하지 않아 보인다. http://192.168.123.106/test.html 과 같이 내가 명명한 URL 주소로 접속했을 때만 응답하고, 그 외 다른 주소로 접속하면 "없는 페이지" 라는 에러메세지(404 Not Found)를 보여주도록 한다.
웹브라우저를 통해 접속하면 이 접속 요청 내용이 일정한 포맷(HTTP)으로 된 문장 형태를 가지고 웹서버에 전달되는데, 여기서 "GET" 다음 부분이 내가 접속하려는 파일(test.hml) 경로이므로 이 부분만 골라내야 한다.

이 접속 요청 문장을 한 글자씩 읽어 들여 변수 c 에 저장( char c = client.read(); )하고 있는데, 추가로 이를 buf 라는 변수에 계속 덧붙여 저장( buf.push(c); )함으로써 조금 더 긴 문장으로 만든 후, 이 문장내에서 "GET" 으로 시작하고 "/test.html" 로 끝나는 부분이 있는지를 찾도록 한다.
찾으면 sendHttpResponse 함수를 호출할 때 200 을 파라미터로 넘겨줘서 원하는 내용( Hello World! )을 보여주도록 하고, 만약 못 찾으면 sendHttpResponse 함수를 호출할 때 404 를 파라미터로 넘겨줘서 404 Not Found 를 보여주도록 한다.
#include "WiFiEsp.h"
#ifndef HAVE_HWSERIAL1
#include "SoftwareSerial.h"
SoftwareSerial Serial1(2, 3); // RX, TX
#endif
char ssid[] = "{와이파이 SSID}"; // your network SSID (name)
char pass[] = "{와이파이 비밀번호}"; // your network password
int status = WL_IDLE_STATUS; // the Wifi radio's status
WiFiEspServer server(80);
RingBuffer buf(20);
void setup() {
Serial.begin(9600);
Serial1.begin(9600);
WiFi.init(&Serial1);
if (WiFi.status() == WL_NO_SHIELD) {
Serial.println("WiFi shield not present");
while (true);
}
while ( status != WL_CONNECTED) {
Serial.print("Attempting to connect to WPA SSID: ");
Serial.println(ssid);
status = WiFi.begin(ssid, pass);
}
Serial.println("You're connected to the network");
printWifiStatus();
server.begin();
}
void loop() {
int type = 404;
String page = "";
WiFiEspClient client = server.available();
if (client) {
Serial.println("New client");
buf.init();
while (client.connected()) {
if (client.available()) {
char c = client.read();
buf.push(c);
Serial.write(c);
if (buf.endsWith("\r\n\r\n")) {
sendHttpResponse(client, type, page);
break;
}
if (buf.endsWith("GET /test.html")) {
Serial.println("test.html");
type = 200;
page = "test.html";
}
}
}
client.stop();
Serial.println("Client disconnected");
Serial.println("==================================");
}
}
void printWifiStatus() {
Serial.print("SSID: ");
Serial.println(WiFi.SSID());
IPAddress ip = WiFi.localIP();
Serial.print("IP Address: ");
Serial.println(ip);
Serial.println();
Serial.print("To see this page in action, open a browser to http://");
Serial.println(ip);
Serial.println();
}
void sendHttpResponse(WiFiEspClient client, int type, String page) {
if (type == 404) {
client.print(
"HTTP/1.1 404 Not Found\r\n"
"Content-Type: text/html\r\n"
"Connection: close\r\n"
"\r\n");
}
else {
if (page == "test.html") {
client.print(
"HTTP/1.1 200 OK\r\n"
"Content-Type: text/html\r\n"
"Connection: close\r\n"
"\r\n");
client.print("<!DOCTYPE HTML>\r\n");
client.print("<html>\r\n");
client.print("<h1>Hello World!</h1>\r\n");
client.print("Here is test.html ");
client.print("</html>\r\n");
}
}
}
아두이노 IDE 에서 업로드 한 후, 지난 번과 동일하게 주소로만 접속해봤다.

404 Not Found 페이지가 나오고 있다.
그 다음에는 내가 지정한 파일(http://192.168.123.106/test.html) 로 접속해봤다.
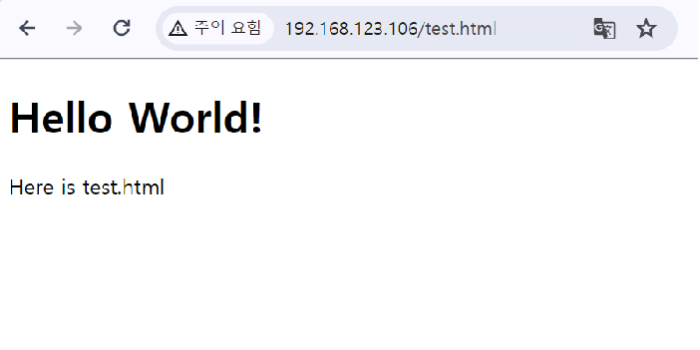
원하는 내용이 잘 나오고 있다.
'아두이노 > 윈도우 절전모드 해제기' 카테고리의 다른 글
| #5 설치 - 공유기 DDNS/포트포워딩 (0) | 2024.02.17 |
|---|---|
| #4 제작 (0) | 2024.02.15 |
| #3 기획 및 검토 - 아두이노 Pro Micro (0) | 2024.02.11 |
| #1 기획 및 검토 - ESP-01 (0) | 2024.02.01 |


